When drivers ask, “why is my power steering fluid leaking,” they often picture a failing pump. That is only one possibility. Fluid may escape from a cracked return hose, loose clamp, worn pressure line, steering rack seal, or pump shaft seal. The location matters. A red or amber puddle near the front axle tells a different story from wetness around the serpentine belt.
Richard Reina, Product Training Director at CARiD, explains, “A leak is a symptom, not a diagnosis.” That principle should guide every inspection. Wipe the suspected area clean, check the fluid level, then look for fresh drops after a short drive. Do not rely on color alone. Transmission fluid and power steering fluid can appear similar, especially on dark concrete.
Industry repair data supports taking the warning seriously. RepairPal’s cost database places power steering pump replacement commonly between about $600 and $700, depending on vehicle and location. A hose or clamp may cost far less when identified early. The Car Care Council also lists fluid leaks among warning signs that deserve prompt attention. These figures are estimates, not promises.
Some vehicles use electric power steering and have no hydraulic fluid reservoir. That detail is easy to miss. The owner’s manual should confirm the system type before any diagnosis begins. Driving with low fluid can make the wheel heavy, produce a whining sound, and damage the pump. I once assumed a wet subframe meant a pump failure. It was only a loose return hose. That mistake matters. Careful inspection prevents expensive guessing.
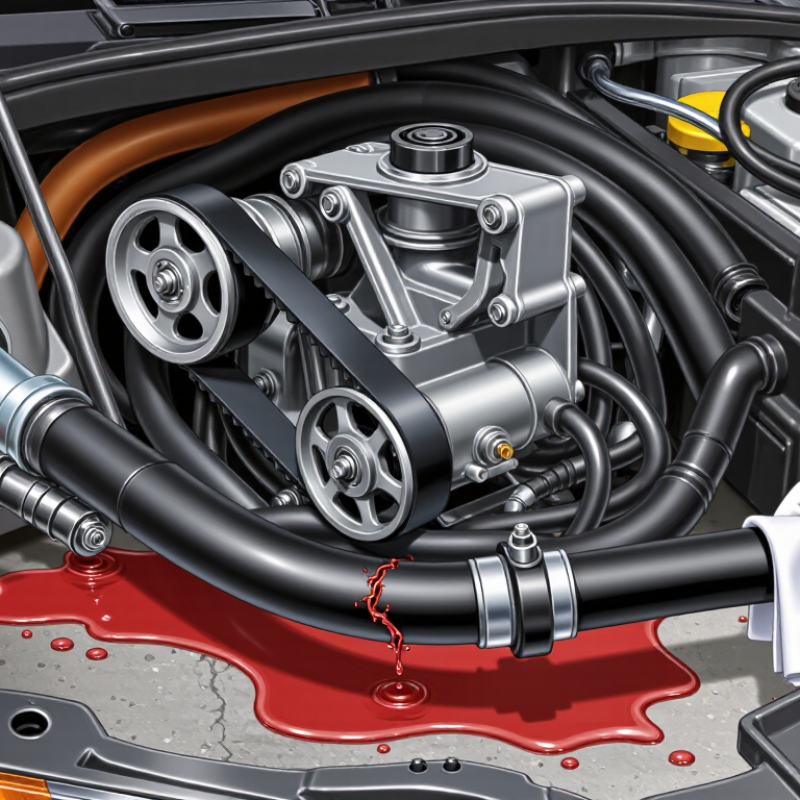
When power steering fluid appears beneath the front axle, do not assume the pump has failed. The first check is simple: identify the fluid type and confirm its level against the vehicle manufacturer’s specifications. I have seen drivers add whatever hydraulic fluid was nearby, then blame a leak for stiff steering. That shortcut can damage seals or change steering feel. Use the owner’s manual or service information, not memory.
Park on level ground, switch off the engine, and let hot components cool. Clean the reservoir cap and surrounding area before opening it. Read the markings at the temperature stated by the manufacturer, because cold and warm levels may differ. If the reservoir is below minimum, add only the specified fluid in small amounts. Do not overfill. A clean funnel helps, but contamination still matters. Record the fluid color, odor, and level before driving. Some fluids darken with age, yet a burnt smell or foamy surface deserves attention.
After topping up correctly, inspect the return hose, pressure line, pump seal, and steering rack boots. Fresh wetness often reveals the leak better than an old stain. Place cardboard beneath the vehicle overnight. Then recheck the reservoir using the same procedure. If the level drops again, steering becomes noisy, or the wheel feels heavy, arrange a qualified inspection promptly. I would not keep adding fluid indefinitely; that hides the rate of loss and can leave the system empty. Specifications vary by vehicle, and guessing is the part worth reconsidering.
Trace wetness from the reservoir downward, not from the largest puddle upward. Clean the reservoir, hoses, pump, and steering gear with brake-safe cleaner. Then dry every surface carefully. Place cardboard beneath the vehicle. Fresh drops will reveal the leak’s direction.
Start with the reservoir cap, seams, and return hose. These areas usually carry lower pressure, but loose clamps can spread fluid widely. I once blamed the steering rack after seeing oil near the subframe. The actual leak was a cracked return hose above it. The first visual clue can mislead you.
Inspect the pressure hose next. It may carry 1,000–1,500 psi when the system operates.
Never touch a suspected leak with your hand. High-pressure fluid can enter skin through a tiny opening.
With the engine off, check fittings and crimped sections for dark, wet tracks. If needed, ask another person to start the engine while you watch from a safe distance. Turn the steering wheel only slightly, and never hold it against full lock. A fine spray may appear briefly near the pump, hose connection, or rack seal. Use cardboard, not fingers, to locate it. Check again after a short drive because airflow can move fluid far from its source. Misreading that trail is common, even during careful inspections.
Power steering fluid rarely leaks without a reason. Hydraulic pressure exposes weak hoses, loose connections, and damaged seals. Park on a level surface and check the fluid level before starting. Then clean the pump, hoses, and nearby components with a suitable degreaser. A clean surface makes the fresh leak easier to trace. Use a flashlight, not your fingers, around a running system. Pressurized fluid can enter small skin wounds.
Inspect each hose for wet spots, cracks, swelling, or hardened rubber. Pay close attention to crimped fittings and bends near the pump. A leak may travel along the hose before dripping elsewhere. The pump pulley area deserves careful attention. Fluid behind the pulley often points to a worn shaft seal. Squealing, foamy fluid, or steering stiffness can support that diagnosis, but these signs are not conclusive. I have learned that guessing from noise alone wastes time.
The rack boots need inspection too. A torn boot can allow dirt inside, but fluid inside the boot may indicate an internal rack seal failure. Gently squeeze the boot only when the engine is off and the system is cool. If fluid escapes, the rack likely needs professional testing or repair. Check the return hose as well, because low-pressure leaks can look harmless while steadily emptying the reservoir. Pressure testing can confirm the source, although rushed testing sometimes creates misleading results. Recheck every connection after the repair and monitor the fluid level over several drives.
Typical hydraulic pressure exposure helps narrow the inspection point. High-pressure hoses, pump seals, and rack seals operate under substantially greater pressure than the return hose, making them more vulnerable to pressure-related leakage.
Reference ranges are typical automotive power-steering values, not a substitute for the vehicle service manual. Fluid inside a rack boot usually indicates an internal rack seal failure; fluid around a pump pulley may indicate a pump shaft-seal leak.
How to Find Why Your Power Steering Fluid Is Leaking
A power steering leak rarely starts where the fluid finally drips. It may travel along a hose, subframe, or steering rack. I once blamed the pump too quickly. The stain was actually above it.
Use ultraviolet dye made for hydraulic systems. Add the recommended amount to the reservoir. Run the engine, then turn the wheel gently several times. Never hold full lock for long. Use UV glasses and a small inspection lamp. The first bright trail usually reveals the leak’s starting point. Wipe old residue away before testing. Otherwise, yesterday’s mess can mislead today’s diagnosis.
Talcum powder offers a cheaper confirmation method. Clean and dry the suspected area first. Dust a thin coat around hose fittings, the pump shaft, and rack boots. Fresh fluid creates a dark, wet path through the powder. Check it after a short drive. Keep powder away from belts and electrical connectors. A 2024 North American vehicle-age report placed the average light vehicle above 12 years, making hardened seals increasingly plausible. Federal crash data also recorded 40,901 U.S. traffic deaths in 2023, although those figures do not identify steering-fluid leaks as a separate cause (NHTSA, 2024). That distinction matters. A leak may not cause an immediate failure, but low fluid can increase steering effort and damage the pump. My earlier assumption was incomplete: finding the drip is not the same as finding the source.
How to Find Why Your Power Steering Fluid Is Leaking
A wet driveway does not identify the failed component. It only shows the final escape point. Start with a clean reservoir, correct fluid level, and a visual inspection around hoses, seals, the pump, and steering gear. Then follow the vehicle’s OEM pressure-test procedure. The specified pressure, test duration, and fluid temperature matter. A generic pressure test can mislead you.
Match the repair decision to the OEM test result and service limits. Pressure below specification may indicate pump wear, internal bypassing, or a restricted supply hose. Excessive pressure can point toward a blocked return path or control fault. Compare measured readings with the service manual, not internet guesses. The 2024 Auto Care Association Factbook places the average U.S. light-vehicle age near 12.6 years. Older systems deserve careful testing, because hardened seals and corroded lines can fail together. The Motorist Assurance Program also emphasizes documented inspection standards and repair recommendations based on measured conditions. I once blamed a pump after seeing fluid near its pulley. The actual leak came from a higher hose connection.
Tips: Clean the area first. Use a calibrated gauge. Record temperature and pressure. Never exceed the OEM limit. If pressure remains normal, inspect return flow and steering-load behavior. A small mirror can reveal fresh fluid behind the pump. Stop and reassess when evidence conflicts. That pause can prevent an unnecessary parts replacement.
| Observed Condition | Most Likely Leak Area | Recommended Inspection or Test | Pressure-Test Interpretation | Repair Decision | Post-Repair Verification |
|---|---|---|---|---|---|
| Fluid is wet around the pump shaft or pulley area | Pump shaft seal, pump housing gasket, or reservoir connection | Clean the pump, run the engine, and observe the area while turning the steering wheel briefly. Check pulley alignment and shaft play. | Pressure that reaches the vehicle-specific relief specification but falls rapidly after the test valve is closed can indicate an internal pump leak or bypassing control valve. | Repair or replace pump according to the service manual. Do not replace only the seal if the shaft or bearing is worn. | Confirm no new seepage, normal belt alignment, no pulley wobble, and stable fluid level after a road test. |
| Fluid appears at a hose joint or crimp | Loose fitting, damaged O-ring, cracked hose, or failed crimp | Inspect the connection with the system clean. Check the hose routing, clamps, fitting threads, and sealing rings. | If the measured pressure is within the OEM operating range but the joint continues to seep, the joint or hose is leaking mechanically rather than from excessive system pressure. | Reseal or replace hose. Use the specified sealing washer or O-ring and tighten only to the specified torque. | Pressure-test again and inspect the connection at idle and during controlled steering input. |
| High-pressure hose is wet along its length | Hose-wall failure, abrasion damage, or pressure-line crimp failure | Look for rubbing marks, bulges, exposed reinforcement, and fluid tracking from the crimp. Never locate a high-pressure leak with bare hands. | Pressure near the system relief limit can expose a weakened hose. A pressure result above the OEM limit may indicate a restriction or incorrect component. | Replace high-pressure hose. Do not patch, clamp, or tape a hydraulic pressure line. | Verify correct routing and clearance from moving or hot components, then repeat the OEM pressure test. |
| Return hose or reservoir hose is damp | Low-pressure return hose, clamp, reservoir nipple, or hardened hose material | Inspect the hose for soft spots, cracks, oil saturation, and clamp position. Compare the hose inner diameter with the specified part. | Return circuits normally operate at substantially lower pressure than the pump outlet. A leak here may occur even when the pump pressure test is normal. | Replace hose or clamp and use the correct fluid-resistant hose material. | Check for aeration, foaming, and fluid loss after bleeding the system. |
| Fluid is leaking from the steering rack or gearbox end | Input-shaft seal, sector-shaft seal, rack seal, or damaged housing | Inspect both ends of the steering gear and the bellows boots. Fluid inside a bellows boot strongly suggests an internal rack seal leak. | Normal pump pressure combined with fluid inside the boot points to a steering-gear seal failure, not necessarily a failed pump. | Rebuild or replace steering gear only as permitted by the service procedure. Replace contaminated boots and inspect linkage components. | Confirm the gear remains dry through full steering travel and perform an alignment if steering-gear components were removed. |
| Fluid is present under the steering gear but the source is unclear | Leak tracking from a hose, fitting, cooler line, or steering-gear seal | Degrease the area, dry it, apply approved leak-detection dye if permitted, and inspect with suitable lighting after operation. | Do not condemn the steering gear until the pressure-side hoses and fittings have been checked under the specified test conditions. | Locate source first. Avoid replacing multiple components based only on the lowest wet point. | Repeat the inspection after cleaning and confirm the original leak path is dry. |
| Pump pressure is below the OEM minimum | Worn pump, slipping belt, low fluid level, air in system, restricted inlet, or incorrect test setup | Check fluid level, belt condition, inlet hose collapse, reservoir screen, air bubbles, and test-gauge connections before condemning the pump. | Below-minimum pressure indicates the pump may not meet steering-assist demand, but trapped air or an inlet restriction can produce the same result. | Correct basic faults first; replace the pump only after the test is repeated using the specified procedure. | Verify pressure, steering effort, and fluid condition after bleeding the system. |
| Pump pressure exceeds the OEM maximum | Blocked outlet, restricted hose, incorrect component, stuck pressure-relief valve, or incorrect test-valve operation | Confirm gauge accuracy, valve position, hose routing, and the specified test fluid. Inspect for restrictions before extended operation. | Pressure above the service limit can overload hoses, seals, and the steering gear and should not be accepted as evidence of a healthy pump. | Find and correct restriction; repair or replace the pump or relief valve if the component fails the manual’s test. | Repeat the test and confirm the result is within the exact vehicle-specific pressure and time limits. |
| Pressure is within specification, but fluid continues to leak | External seal, hose, fitting, reservoir, or steering-gear leak | Use visual tracing, a clean surface, and a short controlled run to identify the exact origin. | A normal pressure result does not rule out an external leak. It mainly indicates that pump output is within the tested range. | Repair the identified external leak rather than replacing the pump solely because fluid is present. | Recheck the repaired area at operating temperature and after a complete steering cycle. |
| Fluid is foamy, noisy, or repeatedly drops after filling | Air entering through the inlet side, low fluid level, loose inlet connection, or improper bleeding | Inspect the inlet hose and clamps, fill with the specified fluid, and bleed using the vehicle-specific procedure without holding the wheel against the stop. | Air can cause unstable or misleading gauge readings and may make a good pump appear defective. | Repair air entry and bleed system. Replace fluid if it is contaminated or aerated beyond recovery. | Fluid should remain at the correct level without foam, and pump noise should be absent during normal steering input. |
| Fluid is dark, contaminated, or contains metallic particles | Fluid degradation, internal component wear, hose deterioration, or contamination introduced during service | Inspect the reservoir, filter screen if equipped, pump fluid, and drained sample. Check for glitter or visible metal. | Pressure may still be within specification even when internal wear is developing; pressure alone cannot assess fluid cleanliness or bearing condition. | Flush and inspect. Replace damaged components if particles or abnormal noise indicate internal wear. | Confirm clean fluid, correct level, no abnormal noise, and no renewed contamination after service. |
| Leak appears only when the steering is held at full lock | Pressure relief circuit, weakened hose, seal, or connection exposed to peak system pressure | Inspect for leaks during brief, controlled steering input. Do not hold the steering wheel against the stop longer than the service procedure allows. | Pressure normally rises sharply near full lock. The exact maximum pressure and allowable test duration must come from the vehicle’s service information. | Repair the leaking component and correct any over-pressure condition before further testing. | Verify leak-free operation without prolonged full-lock loading. |
Identify the specified fluid and compare the level with the manufacturer’s markings. Use the owner’s manual. Do not guess.
Park on level ground and switch off the engine. Let hot components cool. Clean the cap before opening it. Check the level at the specified temperature.
No. Incorrect fluid may damage seals or change steering feel. Add only the specified fluid, using small amounts. Avoid overfilling.
Record the fluid color, odor, and level. A burnt smell or foamy surface deserves attention. Dark fluid alone does not prove failure.
Clean the pump, hoses, and nearby parts with suitable degreaser. Use a flashlight during inspection. Place cardboard under the vehicle overnight.
Check for wet spots, cracks, swelling, and hardened rubber. Inspect bends and crimped fittings closely. Fluid can travel before dripping.
Fluid behind the pulley may indicate a worn shaft seal. Squealing and stiff steering can support that idea. Noise alone is not conclusive.
A torn boot can admit dirt. Fluid inside the boot may indicate an internal rack seal failure. Inspect only with the engine off and system cool.
Follow the vehicle’s specified pressure, duration, and temperature requirements. Use a calibrated gauge. Record the readings carefully. Generic testing can mislead you.
Stop if the level drops again, steering becomes noisy, or the wheel feels heavy. Repeated topping up hides the loss rate. Arrange qualified inspection promptly.
If you are asking, “why is my power steering fluid leaking,” begin by confirming that the fluid type and level match the vehicle manufacturer’s specifications. An incorrect fluid or an overfilled reservoir can create misleading symptoms. Trace any wetness from the reservoir toward the system’s high-pressure components, which may operate at approximately 1,000–1,500 psi. Carefully inspect the hoses, connections, pump seals, and steering rack boots for cracks, looseness, swelling, or pressure-related damage.
To locate the leak accurately, clean the affected area first, then use UV dye or a light dusting of talcum powder to reveal where fresh fluid begins to appear. The highest, cleanest wet point is often closer to the source than the largest puddle. After identifying the suspected component, compare the repair decision with the vehicle’s specified pressure-test results and service limits. Replacing parts without confirming the source can waste time, while ignoring a high-pressure leak may reduce steering assistance and create a safety concern.
DC-Link Auto